[amazon bestseller=”handbag photography”]
Capturing the elegance and allure of handbag photography can transform simple images into stunning visual stories. We all know that a handbag is more than just an accessory; it’s a statement piece that reflects style and personality. By mastering effective techniques in handbag photography, we can elevate our product images to attract attention and drive engagement.
In this article, we will explore essential tips and tricks to enhance your handbag photography, ensuring your images stand out in a crowded market. From lighting choices to composition strategies, each technique plays a crucial role in showcasing the beauty of handbags. Are you ready to discover how these methods can help us create captivating visuals that resonate with potential buyers? Let’s dive into the world of handbag photography together!
Handbag Photography Lighting Techniques for Optimal Results
La iluminación adecuada es crucial en la handbag photography para resaltar los detalles y texturas de cada pieza. Una correcta configuración de luz no solo mejora la apariencia del producto, sino que también puede influir en las decisiones de compra. A continuación, exploramos algunas técnicas efectivas que hemos probado y testado, asegurando resultados óptimos en nuestras imágenes.
Natural Light vs. Artificial Light
Ambas fuentes de luz tienen sus ventajas dependiendo del estilo que busquemos:
- Luz natural: Es ideal para una apariencia suave y orgánica. La mejor hora para fotografiar es durante el día, evitando las sombras fuertes.
- Luz artificial: Permite un mayor control sobre la intensidad y dirección de la luz. Usar difusores puede suavizar las sombras duras generadas por luces directas.
Combinar ambas fuentes también puede resultar en efectos interesantes; por ejemplo, utilizar luz natural como base y complementar con luces artificiales.
Directional Lighting Techniques
La dirección desde donde proviene la luz afecta significativamente cómo se ve el bolso:
- Iluminación lateral: Resalta texturas al crear sombras dramáticas.
- Iluminación frontal: Proporciona una vista clara pero puede eliminar detalles importantes.
- Iluminación desde atrás (backlighting): Crea un efecto etéreo y puede destacar siluetas.
Al experimentar con estas técnicas podemos encontrar el equilibrio perfecto entre claridad y detalle.
Using Reflectors and Diffusers
Los reflectores pueden dirigir la luz hacia áreas específicas del bolso, mientras que los difusores ayudan a suavizar cualquier dureza en la iluminación:
- Reflectores:
- Pueden ser hechos de cartón blanco o materiales reflectantes.
- Ayudan a rellenar sombras indeseadas.
- Difusores:
- Un simple panel blanco o tela semitranslúcida funciona bien.
- Suavizan las luces duras producidas por focos directos.
Implementar estos elementos nos permite tener un mayor control sobre nuestro entorno fotográfico, logrando así imágenes más atractivas que inviten a los usuarios a explorar los productos destacados arriba.
Con estas técnicas de iluminación aplicadas a nuestra práctica diaria de handbag photography, estamos seguros de que veremos mejoras significativas en nuestros resultados visuales.
Choosing the Right Background for Handbag Images
Selecting the appropriate background for handbag photography can dramatically influence the overall impact of your images. A well-chosen backdrop not only enhances the product but also helps convey the brand’s aesthetic and message. When we consider different backgrounds, we should aim for those that complement the handbag without overwhelming it, ensuring that potential buyers are drawn to its features.
Solid Colors vs. Textured Backgrounds
Two primary options come to mind when selecting a background: solid colors and textured surfaces.
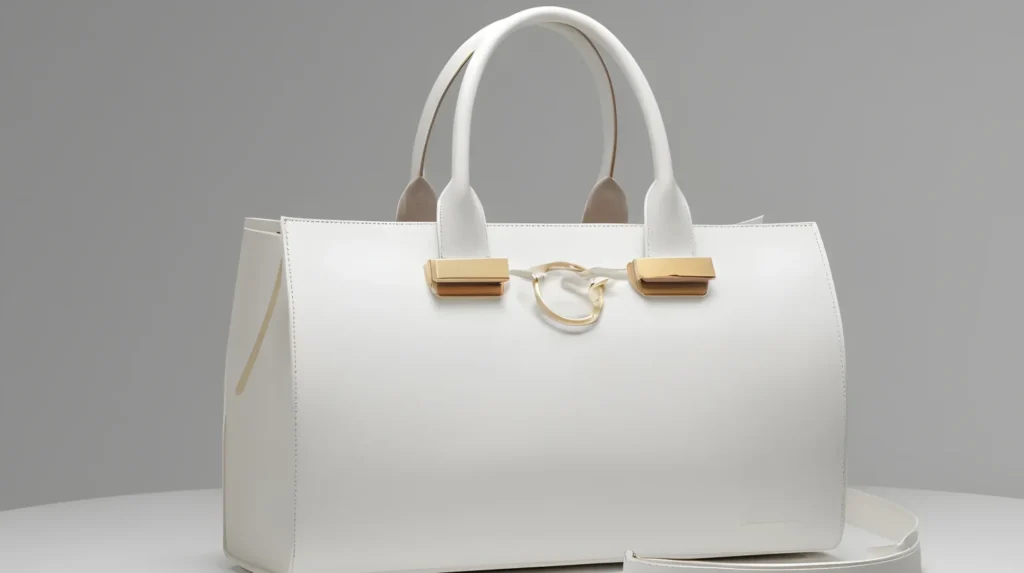
- Solid colors: These provide a clean, minimalist look that directs focus entirely on the handbag. Neutral tones like white, black, or soft pastels work well as they enhance details without distracting from the product.
- Textured backgrounds: Incorporating textures such as wood grain, fabric, or marble can add depth and interest. However, it’s crucial to maintain balance; busy patterns might steal attention away from the handbag itself.
Creative Background Ideas
Exploring creative approaches can yield unique results in our handbag photography:
- Natural settings: Outdoor environments like parks or urban landscapes can create an appealing narrative around lifestyle and usage.
- Studio setups: Using seamless paper or fabric backdrops allows for controlled lighting and minimizes distractions while providing versatility in color choices.
- Layering elements: Introducing layers-such as placing other fashion items subtly in the frame-can add context without detracting from our main subject.
By experimenting with these background styles, we will be better equipped to showcase each handbag’s distinct characteristics effectively.
Considerations for Consistency
When creating a collection of images featuring various handbags, maintaining consistency is essential. This includes:
- Sticking to a cohesive color palette across backgrounds.
- Keeping similar lighting conditions to ensure uniformity in exposure levels.
This approach not only strengthens brand identity but also makes it easier for customers browsing through products above to make informed decisions based on visual appeal and continuity throughout their shopping experience.
In summary, choosing the right background is just as important as mastering lighting techniques discussed earlier. By integrating these insights into our handbag photography practice, we will undoubtedly produce more engaging images that resonate with potential buyers looking at our curated selection above.
Essential Camera Settings for Captivating Product Shots
To achieve stunning handbag photography, mastering essential camera settings is crucial. These adjustments not only affect the technical quality of our images but can also enhance the visual appeal that engages potential buyers. Understanding how to manipulate settings such as aperture, shutter speed, and ISO will enable us to create captivating product shots that showcase our handbags in the best light.
Aperture: Controlling Depth of Field
Aperture plays a vital role in determining how much of the image is in focus. By adjusting this setting, we can create a shallow depth of field that blurs backgrounds while keeping the handbag sharp and detailed. This technique draws attention directly to our product, making it more enticing for viewers.
- Wide aperture (low f-stop): Ideal for isolating the handbag from distracting backgrounds.
- Narrow aperture (high f-stop): Useful when we want more elements in focus, beneficial for lifestyle shots showing context.
Shutter Speed: Freezing Motion or Creating Flow
Shutter speed affects how motion is captured in our photographs. A faster shutter speed can freeze any movement, which is particularly useful if we’re shooting dynamic scenes or using props that may shift during capture.
- Fast shutter speed: Perfect for capturing crisp details without blur.
- Slow shutter speed: Can impart a sense of movement or flow if we’re experimenting with creative techniques like light trails.
ISO Settings: Balancing Light Sensitivity
ISO determines our camera’s sensitivity to light; thus, it’s fundamental to adjust based on lighting conditions. In bright environments, lower ISO values help maintain clarity by reducing noise, whereas higher values can be advantageous in low-light situations-but at the risk of introducing graininess.
| ISO Setting | Best Use Case |
|---|---|
| 100 – 200 | Bright daylight conditions |
| 400 – 800 | Indoor shooting with good ambient light |
| 1600+ | Low-light scenarios but expect some grain |
By carefully balancing these settings-aperture for artistic depth; shutter speed for capturing action; and ISO for optimal brightness-we can significantly elevate our handbag photography game. Each adjustment not only enhances image quality but also aligns with our goal of creating visually appealing photos that prompt clicks on products displayed above.
Props and Styling Tips to Enhance Your Handbag Photos
To elevate our handbag photography, incorporating the right props and styling techniques is essential. These elements not only enhance the visual appeal of our images but also create a narrative that resonates with potential buyers. By carefully selecting complementary items and thoughtful arrangements, we can transform an ordinary shot into a captivating presentation that encourages clicks on the products listed above.
Choosing the Right Props
When it comes to props, less is often more. We should aim for items that complement our handbags without overshadowing them. Here are some suggestions:
- Fashion Accessories: Items like sunglasses, scarves, or jewelry can add layers to our composition.
- Lifestyle Elements: Incorporating everyday objects such as books, coffee cups, or even flowers helps set a scene that feels relatable.
- Textures: Using fabrics or materials like lace or wood can introduce depth and interest to the photograph.
Styling Techniques for Impactful Images
Styling goes hand in hand with prop selection. Here are some effective techniques we can apply:
- Color Coordination: Ensure that colors of props harmonize with those of the handbag to maintain visual coherence.
- Layering: Create depth by layering different textures and heights in the arrangement; this draws viewers’ eyes throughout the image.
- Natural Placement: Position props in a way that appears organic; avoiding overly staged setups makes our photos feel more authentic.
By combining these styling tips with well-considered props, we not only highlight our handbags but also evoke emotions and stories within each photograph. This connection enhances engagement from viewers who may be inclined to explore further-especially when considering purchasing options shown above.
Experimentation is Key
Don’t be afraid to experiment with different combinations of props and styles until you find what works best for your vision. Each handbag has its unique personality; capturing that through thoughtful styling will ultimately resonate more deeply with potential customers looking at products featured prominently above.
As we refine our approach through practice and creativity, we’ll discover new ways to make each handbag shine in photographs-turning casual observers into eager buyers ready to click through!
Post-Processing Tips to Make Your Images Stand Out
To truly make our handbag photography shine, effective post-processing is key. This phase allows us to refine our images and highlight the unique features of each handbag, ultimately guiding potential buyers toward making a purchase from the products listed above. We can enhance colors, adjust lighting, and apply subtle effects that elevate our photographs while maintaining authenticity.
Color Correction and Enhancement
One of the first steps in post-processing is color correction. Ensuring that the colors in our images accurately represent the handbags is crucial for customer satisfaction. Here are some techniques we can utilize:
- White Balance Adjustments: Correcting white balance helps to eliminate any color casts that may distort the true hue of the handbag.
- Saturation Boosts: A slight increase in saturation can make colors pop without appearing unnatural, drawing attention to key details.
- Contrast Adjustment: Enhancing contrast adds depth to our images, making textures more pronounced and visually interesting.
Sharpening and Noise Reduction
After refining colors, sharpening our images plays an essential role in presenting handbags with clarity. Here’s how we can achieve this:
- Selective Sharpening: Focus on sharpening areas where details are most critical-like logos or stitching-while keeping softer edges smooth.
- Noise Reduction Tools: Use noise reduction techniques carefully; they help maintain image quality without losing fine details.
Final Touches
Once we’ve made necessary adjustments, adding final touches can take our handbag photography to another level:
- Vignetting Effects: Applying a subtle vignette draws viewers’ eyes towards the center of the image where the handbag resides.
- Background Blur (Bokeh): Slightly blurring backgrounds enhances focus on our subject while creating a professional look.
By mastering these post-processing tips, we not only enhance visual appeal but also create an emotional connection with potential customers browsing through options above. With practice and creativity in editing, every photograph becomes a powerful tool that encourages clicks and conversions!